
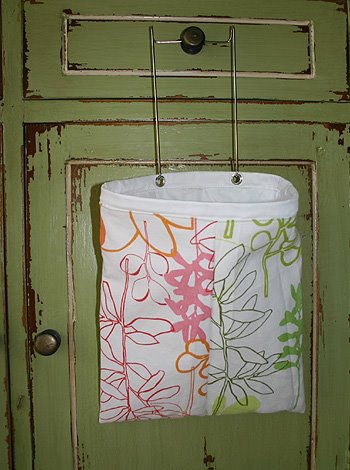
a simple 15-20 minute project that transforms an ordinary white clothes pin bag into something a bit more beautiful. of course you can also use this type of bag for anything from holding mail to car trash to the little bitty fluff that you must take out of your dryer with every use.
: materials needed :
scissors . pins (optional) . thread . fabric (12" x 25")
basic clothes pin bag (mine is from kmart)
scissors . pins (optional) . thread . fabric (12" x 25")
basic clothes pin bag (mine is from kmart)
Step 1 : cut your fabric
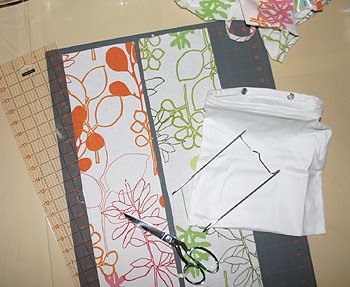
cut your fabric into a rectangle that fits your clothes pin bag, but be sure to add 1" to each measured length. the body of the clothes pin bag i purchased was 11" x 12" so i cut my material into a 12" x 25" rectangle.
step 2 : fold fabric in half lengthwise, right sides together
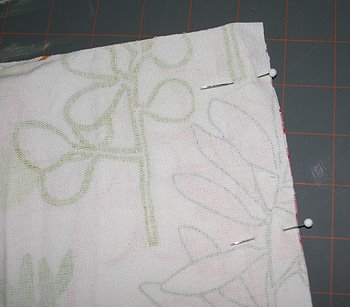
you can choose to pin or not pin your side seams. i actually don't as sewing a long straight seam on a cut edge is not very difficult and just adds another step you truly don't need.
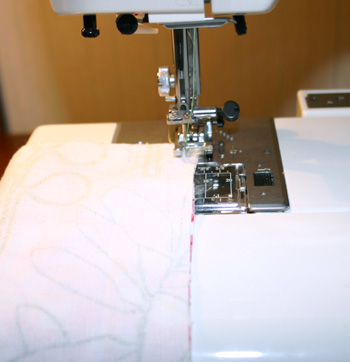
3. sew side seams together - 3/8" seam allowance
: fabric after sewing side seams :

i chose to sew from the folded edge to the open edge so there were no problems with bunched fabric when i got to the end.
4. trim your corners

i always cut my corners as the fabric will "point" at the folded seams better and the overall finished look is much more polished looking.
5. turn your fabric right side out

. your fabric should now look like a square "bag" with two finished sides and the bottom edge.
6. insert your clothes pin liner into your square of fabric

make sure that the clothes pin bag (your liner) is pushed all the way down so both bottom edges and all corners meet. make sure you push your corners out so you have true "points" at the bottom hem; puffy points just aren't cute.
7. turn under the top edge of fabric and pin to clothes pin bag

this is where it's important to use pins so the top edge of your fabric meets the liner right below the stiff liner edge. you can see in my picture (above) that there is a 1" white edge above my fabric. this is a stiff boning that helps hold the clothes pin bag completely open. you won't want to sew on this as you will need to insert the hanging strap into the two grommets in the back.
8. sew fabric to clothes pin liner

i sew as close to my fabric edge as possible with a contrasting thread to add some dimension to the bag. i used a straight stitch but a zig-zag or other embellished stitch would be just as nice.
step 9 : insert hanging bar & you are finished
front
front
back

No comments:
Post a Comment